Demystifying Blend Modes
Hello Coders! 👾
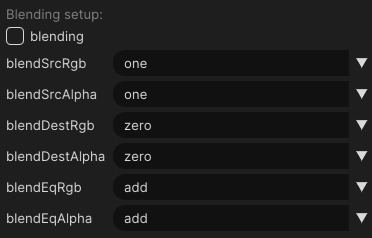
Understanding GL blend modes can be challenging, especially when dealing with visual effects like smoke or fire in your projects. Today I (finally) want to break down these blend modes, focusing on how they work in the pipeline settings of Wonderland Engine, without diving into coding specifics or getting too technical.
What are GL Blend Modes?
Blend modes in graphics are ways to combine two images (or colors) to achieve various visual effects. These modes manipulate how the source (your object) and destination (what’s already on the screen) colors blend. In Wonderland Engine you can configure the blending modes in the pipeline settings. You’ll need to do this when you need transparent materials or to achieve certain particle effects.
Key Components of Blending
The main component of this blending is the interaction between two primary components: the source and destination colors. The Source Color, represented by blendSrcRgb and blendSrcAlpha, is the initial color and alpha value of your object, such as a particle. This source determines how much of its color and transparency should contribute to the final output.
On the other side, we have the Destination Color, denoted by blendDstRgb and blendDstAlpha, which is the existing color and alpha on the screen. The destination’s role is to interact with the source, influencing the final appearance of the pixel.
The blending process also utilizes equations determined by blendEqRGB and blendEqAlpha. These control how the source and destination values are mathematically combined. Options like adding or subtracting define the overall blending effect.
The balance and calculation between these two components allow for various effects.
So:
-
Source Color (blendSrcRgb and blendSrcAlpha): This refers to the color and alpha of your object, like a particle or the texture of the object you want to render using this pipeline.
-
Destination Color (blendDstRgb and blendDstAlpha): This is the color and alpha already rendered on the screen and needs to be mixed with the source color.
Blending Equation
The blending equation is a mathematical operation that combines these components. In Wonderland Engine you can specify RGB and Alpha individually. To explain what they do, let me first give you the equations for them:
Add
Combines the source and destination colors by adding their values together. This results in a brighter color and is often used for glow effects.
Final RGB:
(blendSrcRgb × SrcFactor) + (blendDstRgb × DstFactor)
Final Alpha:
(blendSrcAlpha × SrcAlphaFactor) + (blendDstAlpha × DstAlphaFactor)
Subtract
Subtracts the destination color values from the source color values. It can create a darkening effect where the destination influences the final color.
Final RGB:
(blendSrcRgb × SrcFactor) - (blendDstRgb × DstFactor)
Final Alpha:
(blendSrcAlpha × SrcAlphaFactor) - (blendDstAlpha × DstAlphaFactor)
Subtract-Reverse
Subtracts the source color values from the destination color values, which can lead to different darkening effects compared to the standard subtract mode.
Final RGB:
(blendDstRgb × DstFactor) - (blendSrcRgb × SrcFactor)
Final Alpha:
(blendDstAlpha × DstAlphaFactor) - (blendSrcAlpha × SrcAlphaFactor)
Min
Takes the minimum value of each color component from the source and destination. This can result in a darker final color by keeping only the least intense values.
Final RGB:
min(blendSrcRgb × SrcFactor, blendDstRgb × DstFactor)
Final Alpha:
min(blendSrcAlpha × SrcAlphaFactor, blendDstAlpha × DstAlphaFactor)
Max
Takes the maximum value of each color component from the source and destination. This results in a brighter final color by keeping only the most intense values.
Final RGB:
max(blendSrcRgb × SrcFactor, blendDstRgb × DstFactor)
Final Alpha:
max(blendSrcAlpha × SrcAlphaFactor, blendDstAlpha × DstAlphaFactor)
Factors Explained
Blending factors (SrcFactor/SrcAlphaFactor, DstFactor/DstAlphaFactor) are crucial in determining how colors and transparencies interact in rendering. Let’s break these down:
Zero: Multiplies the color by zero, effectively removing it from the blend equation. This is useful for masking effects where you want to ignore certain colors.
One: Multiplies the color by one, leaving it unchanged. This factor is ideal for simple overlays where the original color should remain intact.
Source Color: Uses the color of the source as the blend factor. It multiplies the incoming color, making it perfect for tint effects where the source color influences the output.
One Minus Source Color: Utilizes one minus the source color, effectively inverting it. This is useful for subtractive blending, where you want to reduce certain color intensities.
Source Alpha: Uses the alpha of the source for the blend factor. It’s perfect for semi-transparent objects, allowing them to blend smoothly with the background.
Source Alpha Saturate: Clamps the source alpha to a maximum of one, preventing it from exceeding unity. This is handy for antialiasing, ensuring that transparency remains controlled.
One Minus Source Alpha: Uses one minus the source alpha, effectively inverting transparency. This is good for fading effects, where you want the source to gradually blend with the background.
Destination Color: Uses the color of the destination (the existing pixel on the screen) for the blend factor. It multiplies the existing color, useful for dynamic lighting effects where the destination influences the overall scene.
One Minus Destination Color: Inverts the destination color by using one minus the destination color. This creates unique subtractive visuals, ideal for effects requiring contrast adjustments.
Destination Alpha: Utilizes the alpha of the destination for the blend factor. It’s useful for layered transparency, ensuring that existing transparency is considered in blending.
One Minus Destination Alpha: Uses one minus the destination alpha, inverting the destination transparency. This is great for complex layering effects, allowing for intricate visual compositions.
By understanding and utilizing these factors, you can achieve a wide range of visual effects, from simple overlays to complex, dynamic scenes. In practice, I’ve found that I rarely need most of these. For me, the most common are One, Source Alpha, and One Minus Source Alpha.
In practice: Alpha Blending
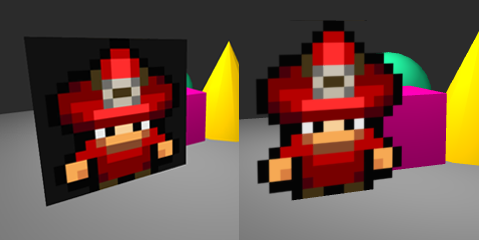
One of the most common blending effects I use when working with particles or other transparent objects is Alpha Blending. With alpha blending the alpha channel of the texture is key. Often an image is used that has parts fully transparent, but some parts just a bit transparent as well. You want to see through this.
For alpha blending, we use the following equations and factors:
blendSrcRgb: Source Alpha
blendSrcAlpha: One
blendDestRgb: One Minus Source Alpha
blendDestAlpha: One Minus Source Alpha
blendEqRgb: Add
blendEqAlpha: Add
Now, let’s take 2 pixels and blend those. Let’s use RGBA values in the range of 0.0 to 1.0 and calculate 1 pixel that is being drawn on the screen.
Particle Pixel (Source): RGBA(0.20, 0.39, 0.59, 0.5)
Screen Pixel (Destination): RGBA(0.39, 0.59, 0.78, 1.0)
We use the following formulas based on the above:
Final RGB = (Source_RGB × Source_Alpha) + (Destination_RGB × (1 - Source_Alpha))
Final Alpha = (Source_Alpha × 1) + (Destination_Alpha × (1 - Source_Alpha))
This means that, if we take the red color of a pixel in our texture we multiply that by our alpha. In this case, because the alpha is 0.5, red becomes 0.1. In the case of alpha blending, we need to balance that. Thus, for the destination where we want the color to blend with,
If we fill this with the values from the source and destination colors we get:
Final Red = (0.20 × 0.5) + (0.39 × (1 - 0.5)) = 0.10 + 0.195 = 0.295
Final Green = (0.39 × 0.5) + (0.59 × (1 - 0.5)) = 0.195 + 0.295 = 0.49
Final Blue = (0.59 × 0.5) + (0.78 × (1 - 0.5)) = 0.295 + 0.39 = 0.685
Final Alpha = (0.5 × 1) + (1.0 × (1 - 0.5)) = 0.5 + 0.5 = 1.0
Result: RGBA(0.295, 0.49, 0.685, 1.0)
In practice: Additive Blending
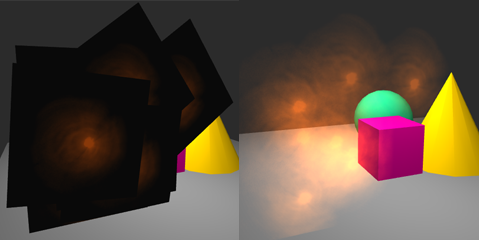
When adding particles for smoke or fire, you typically want them to visually accumulate and become brighter when more pixels are on top of each other.
blendSrcRgb: Source Alpha
blendSrcAlpha: One
blendDestRgb: One
blendDestAlpha: One
blendEqRgb: Add
blendEqAlpha: Add
This setup adds the source color directly to the destination color, which works well for smoke and fire effects that should glow or accumulate light.
Let’s take the same 2 pixels again and blend them.
Particle Pixel (Source): RGBA(0.20, 0.39, 0.59, 0.5)
Screen Pixel (Destination): RGBA(0.39, 0.59, 0.78, 1.0)
We use the following formulas based on the above:
Final RGB = (Source_RGB × Source_Alpha) + (Destination_RGB × 1)
Final Alpha = (Source_Alpha × 1) + (Destination_Alpha × 1)
In detail, when we take the red color of a pixel in our texture we multiply that by our alpha. Then when basically add this to the pixel that was already on the screen. Keep in mind that the colors are always capped at 1.0, so they can never be higher than that.
If we fill this with the values from the source and destination colors we get:
Final Red = (0.20 × 0.5) + (0.39 × 1) = 0.10 + 0.39 = 0.49
Final Green = (0.39 × 0.5) + (0.59 × 1) = 0.195 + 0.59 = 0.785
Final Blue = (0.59 × 0.5) + (0.78 × 1) = 0.295 + 0.78 = 1.075 (Will be capped at 1.0)
Final Alpha = (0.5 × 1) + (1.0 × 1) = 1.5 (Also capped at 1.0)
The result is a bit brighter than the result from the previous calculation.
Result: RGBA(0.49, 0.785, 1.0, 1.0)
Recap
I hope that after reading this post you finally understand the blend modes, at least I do now 😅. Using these blend modes helps to create various visual effects. When working on games you definitely will encounter situations that are slightly different from the two situations I explained. But, understanding these fundamentals allows you to achieve stunning visual effects in your projects.
Happy Coding! 🚀


