WebXR on Azure Static Web Apps
Introduction
To have other people play your games you might want to deploy them to somewhere. There are a lot of different options, but one I personally use very often is to deploy them to Azure Static Webapps . I’ve got all my games and prototypes running on Azure, on Static Web Apps. It’s very easy to set up, hooks directly into GitHub, it’s free and you get some cool bonus features as well. The best one might be that it automatically creates a website for PR in GitHub.
Here’s how to get started.
Prequisites
There are a few things you need before starting this tutorial. I’m going to assume you are building games (or apps) that do not need a back-end. You can do some things with Azure Functions for example, but the website part should be static. I’m also going to assume you have an Azure account. If not, it’s not hard to get one. Just go to
https://azure.com
, and click on get started for free or something. Keep in mind it does ask for your credit card, but you won’t get billed until you are going to use services that are not free.
Setting up a Static Web App.
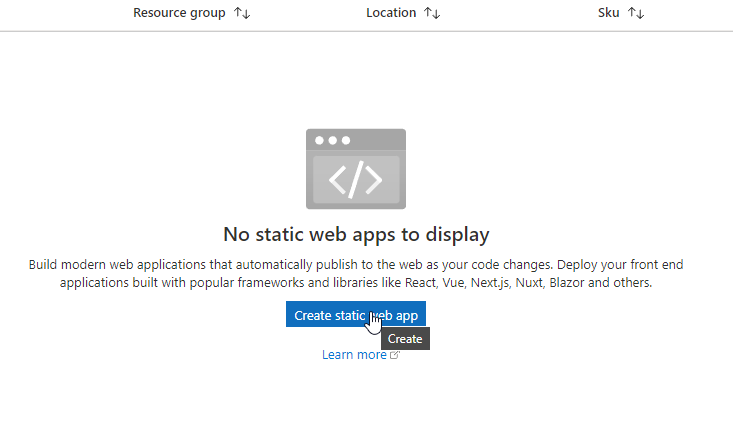
Head over to the Azure portal, search for Static Web Apps in the searchbar at the top, select it to navigate to your Static Web Apps. Hit Create in the center of your screen when it’s the first one, or at the top left when you want to create more.
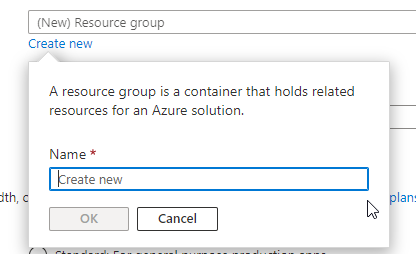
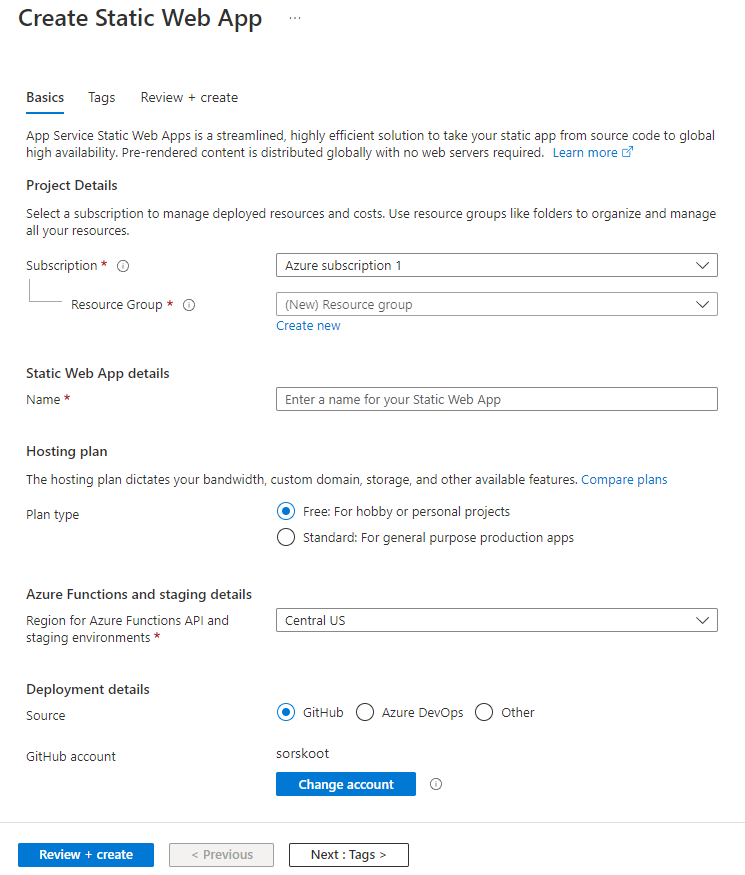
On the Basics tab, you’ll need to enter some values. First, select your Azure subscription if you have multiple or leave it if you only have one. Then create a new resource group or select an existing one. The resource groups are for grouping together your services in Azure.
Give your Static web app a name and choose a region near you or your users. Choose Free for the free option.
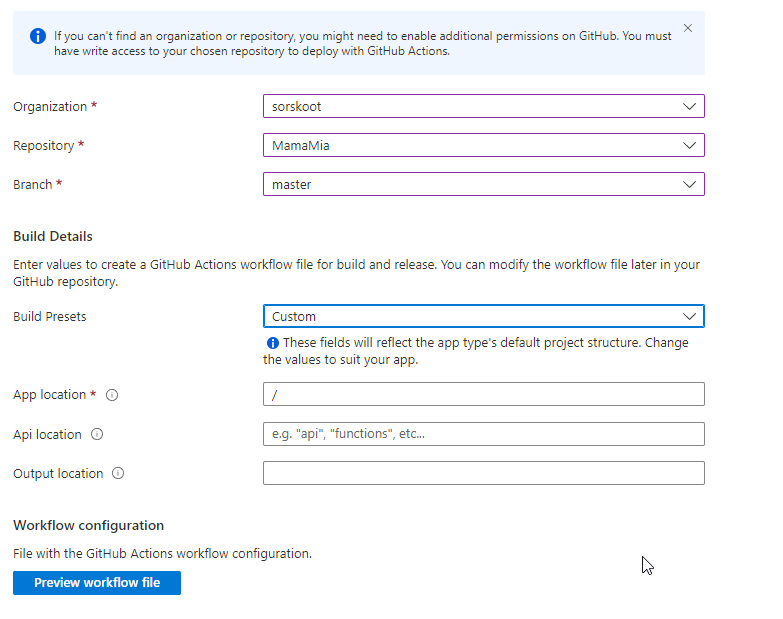
For signing in with GitHub, authenticate if prompted. Then choose the GitHub organization that owns the repository and then select the repository containing your static website code as well as the branch you want to deploy. You’ll also need to select a build preset (like Blazor, Angular, React or Custom) as well as enter locations for your app’s source code, API’s source code and app’s build output — all relative to the root of your repository. With my Wonderland Engine games the output location is /deploy, but other games might use /dist.
Finally, select Review + create!
Please review the details and click Create. Then, you can wait for the deployment to finish, which you can monitor either in the Notifications area or on the GitHub Actions tab of your repository. Once it’s done, select Go to resource to open your Static web app in the Azure portal. Lastly, click the URL link to open your website in a new browser tab. You should then be able to see your game running in Azure!
Last notes
Sometimes it might be necessary to customize the GitHub Workflow that is created. In case of my games that are build with Wonderland Engine I need to make sure the Workflow uses Wonderland to build . If your game is using an npm script called ‘build’ it will build automatically.
If you want, you can also add a custom domain to it. If everything was successful, you should now have a running website in Azure. You can share the URL with others, so they can play your game! Drop into my discord if you have any questions.


