Twitch Stream Setup
Whenever I have some spare time I get into coding on my personal projects . A few years ago I started live coding, on LiveCoding.tv at the time. There were some people streaming programming on Twitch at the time, but only game devs and that was not what I was doing. I tried switching over to Twitch, but the lack of growth of the channel and lack of motivation from my side led me to stop. Earlier this year I decided to pick it up again. This time only on Twitch , where the community of Live Coders is growing fast. I felt welcome in the community. And I got affiliated pretty quickly, thanks to the support of the community. If you are looking for people coding on Twitch, you should have a look at the LiveCoders team .
A lot is going on when running a stream. In this post, I’d like to give you a look backstage to what is going on during the streams.
Of course, there’s audio, video and a view of my screen. But there’s a lot more going on…
Hardware/Software
Let’s have a look at the hardware I’m using for the live coding streams first. Because I’m doing projects with VR and graphics for work as well besides web development, my employer ( Centric ) was kind enough to provide me with an Alienware 17 R5 laptop. This is perfect for 3D modeling and running the Oculus Rift. But has also enough power to encode video for a live stream. Where I used to have issues with my previous laptop, like dropping frames and such, now this is completely over. I will get into more detail about OBS later.
This is the list of hardware I’m using:
- Alienware 17 R5
- HP LA2405wg Monitor (old, but still works fine)
- Das Keyboard Professional
- Logitech MX Master 2S
- Logitec 920c
- Blue Yeti
- Elgato Stream Deck
- 8 port Sitecom powered USB hub
Software-wise I’m using OBS to stream. I’m using VSCode (mostly) to code with the Synthwave'84 theme . For the audio, I use VoiceMeeter Potato to route the audio and to have fine control over the volume of everything. I use SoundByte to play soundFX. The music I play in the background during the stream is Monstercat . I build a custom player that runs inside OBS and renders a visualization on the audio. I’ve also got a chatbot running, which I also build myself. Her name is Rosie , named after the maid in the TV series The Jetsons. At the moment I’m using StreamLabs for the alerts.
Audio
In the early days of my stream, I used a cheap headset. The quality of the audio was very bad. The only benefit was that I could take it and stream from pretty much anywhere. I have it replaced with a Blue Yeti . This is a UBS microphone which could be used on its own stand. I have removed this stand and screwed it onto a boom arm. During a stream, it’s just below the camera, between the keyboard and my mouth. When I started streaming I didn’t bother too much with the audio. But slowly I’m starting to get more and more obsessed with it. I think it’s one of the hardest things to get right when streaming. And I know that at one point in the future I will replace the Yeti with a good XLR mic and replace VoiceMeeter with a hardware mixer. These things cost a lot of money though.
VoiceMeeter
During a live stream, I have a couple of things going on that make sound. I want to have full control of what the volumes of each are. I used to have everything set in OBS, but that wasn’t fine-grained enough. I needed more control. Then I came across VB-Audio VoiceMeeter. Since I wanted to have the most control possible I got the VoiceMeeter Potato . This tool is donationware, which means you can pay whatever couple of $ you want for a license.
I have my mic, the music, sound effects, and my desktop all going to separate channels. I also use a channel in VoiceMeeter for a USB mixer I use sometimes outside the streams. I also have a channel reserved for Spotify. I’m not using Spotify anymore during the stream but might listen to it while working.
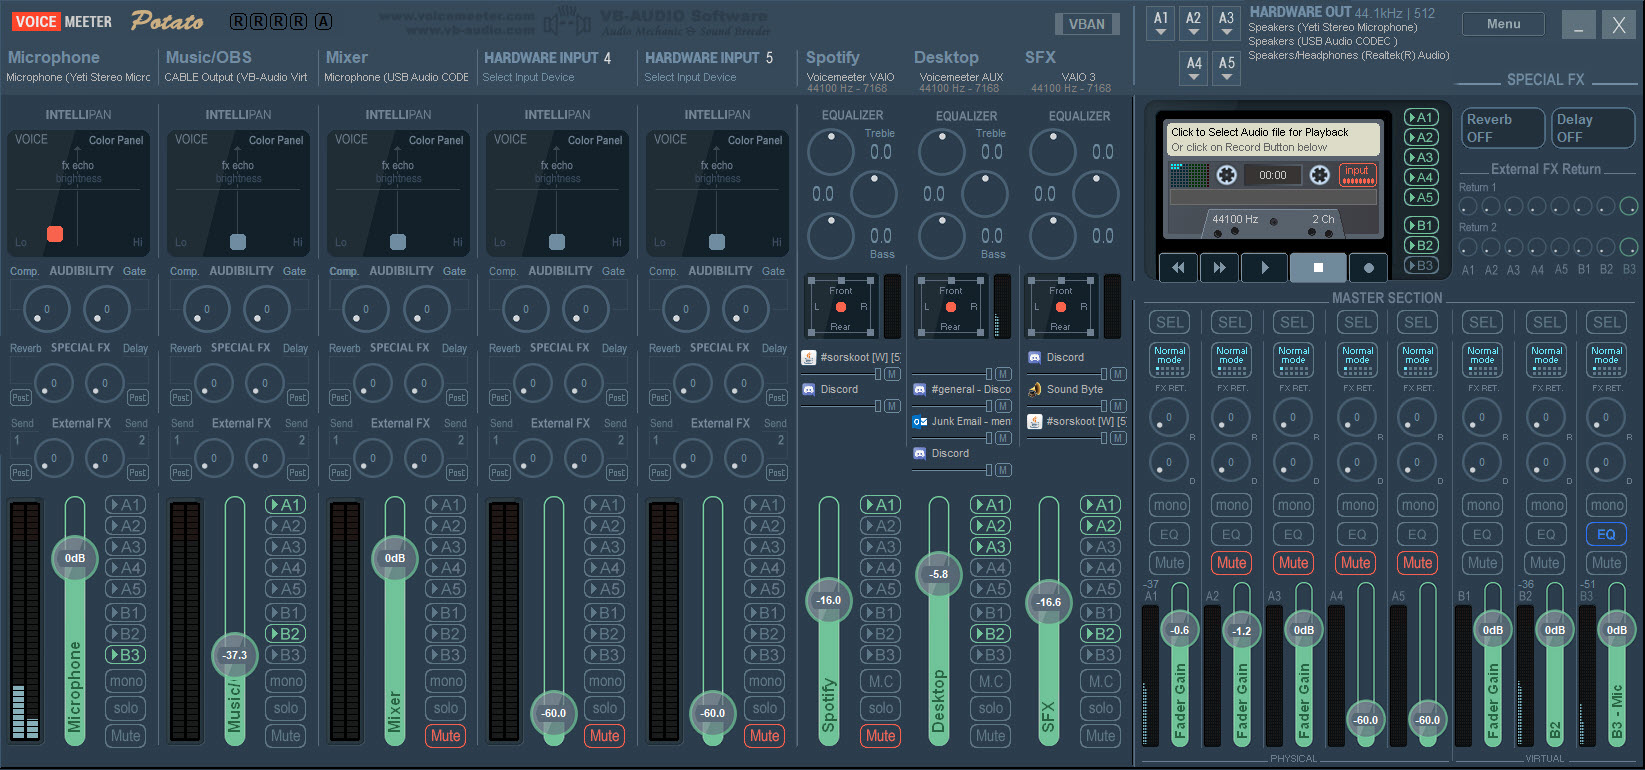
Let me explain my VoiceMeeter set up in a little bit more detail. Here’s a screenshot of my setup:
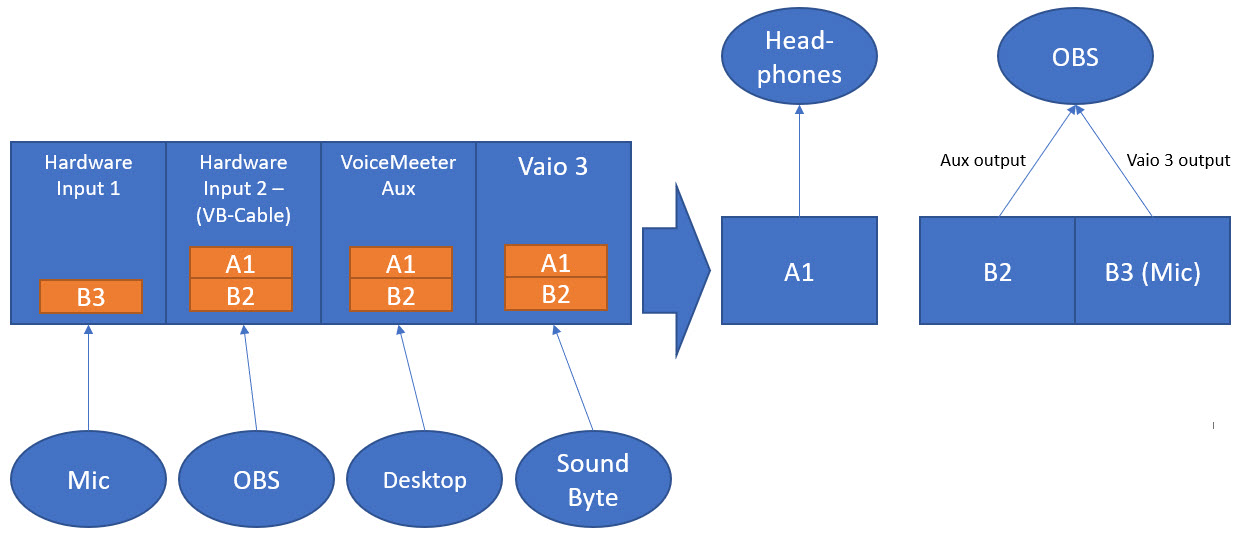
If we go over the channels from left to right, we start with the channel for the microphone. I’ve routed this to B3 only. The ‘B’ channels on the mixer are virtual outputs, where the ‘A’ channels are routed to real hardware outputs. I’m only using B3 for my microphone. This way I can get it onto a separate input in OBS and have OBS mute it.
The second channel is the output from OBS. I’m using an extra free program from VB-Audio here as well: VB-Cable . This program gives you an extra ‘hardware’ audio output to work with. On top of the 3, you get with VoiceMeeter Potato. I’ve routed this channel to B2 for use in OBS and A1. A1 I’ve routed to my Blue Yeti. The microphone has also a headphone output and volume control on there. Without routing the sound to here I won’t hear anything but my voice.
I’m skipping the other hardware inputs since they are not used for streaming, and go to the virtual inputs. For the stream, I use only VoiceMeeter AUX for my desktop audio and VoiceMeeter VAIO 3 for the sound fx. Both are routed to B2 and at least A1
Here’s a sketch of the setup.
As an experiment, I tried having the audio on channel 2 going only to stream (B2) and Spotify only to my headphones (A1). This actually works :) This way I can listen to some music while the viewers of the live stream listen to something else. I’m not planning on using this while streaming, but it is nice to know that it is possible to do things like that.
If you have trouble getting the outputs of your applications routed to the right channel in VoiceMeeter. Try going to the Windows Mixer, by typing mixer in your start menu.

Within these settings, you can specify which output should be used for every app. I have set SoundByte to output to VoiceMeeter VAIO3 Input and OBS to CABLE Input.
Normally you don’t need to route OBS to separate channel. If you are using alerts from StreamLabs with sound you might, but you’ll probably be fine without. I wanted to do something special with the audio. So, I created a music player to play and visualize the audio myself. Since this is running inside a browser window in OBS, I used VoiceMeeter to control the volume.

Audio inputs and routing in a list:
| input | from | routed |
|---|---|---|
| Blue Yeti Microphone | Hardware In | B3 |
| OBS (music) | VB-Cable | A1, B2 |
| Desktop Audio | VoiceMeeter AUX | A1, B2 |
| Sound FX | VoiceMeeter VAIO 3 | A1, B2 |
OBS
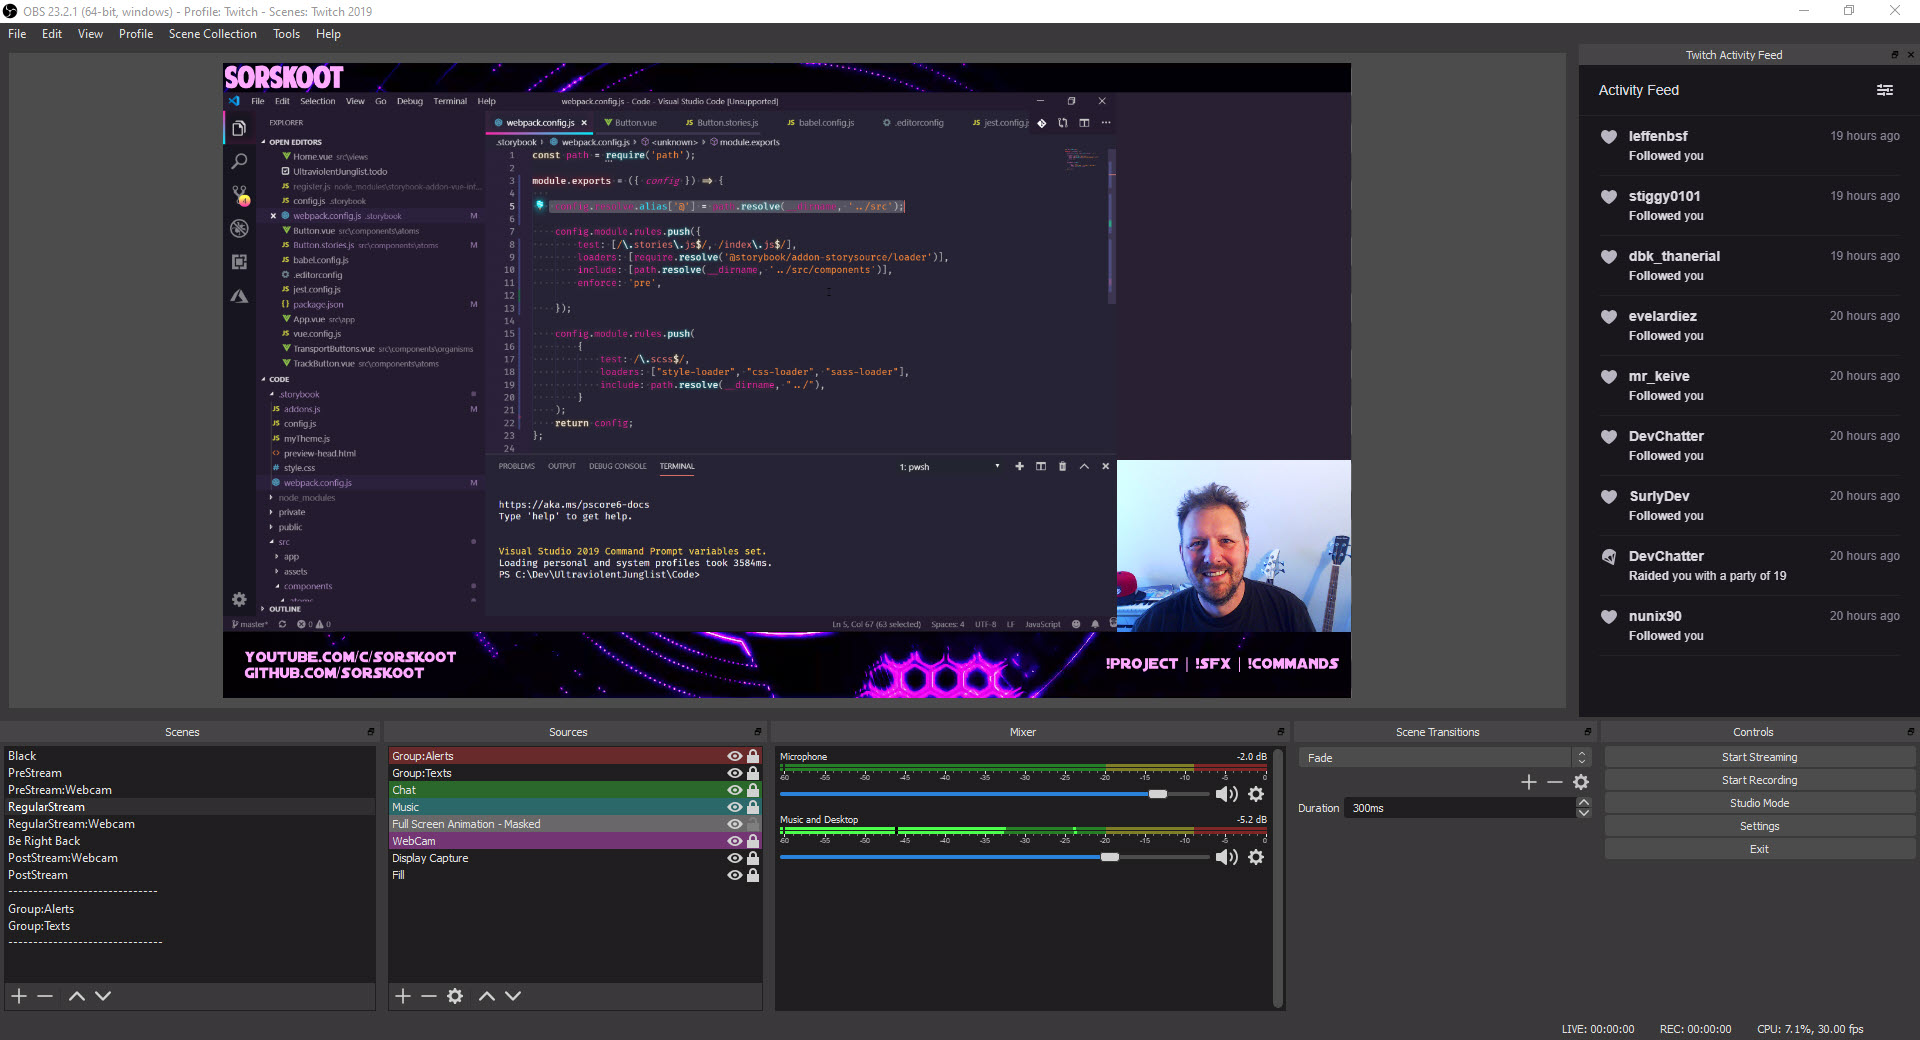
Inside OBS I don’t have to do a lot with the audio anymore. I get the correct mix and the mic on a separate channel. I added them to two different input channels in the Audio Settings in OBS.

Instead of using the VoiceMeeter names I renamed them in the mixer so it’s clear what both channels are. I’ve set the volume of the mic a little bit higher than the rest of the audio.

To make my voice a little bit better I’ve added a couple of filters to the mic. In OBS you can use VST Plugins. These are plugins that are very common in audio programs. I’m using the free
Reaper VST plugins
to improve the audio. The settings are not perfected yet and I’m constantly improving them to create a better sound.
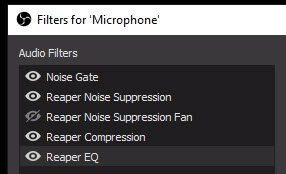
If you don’t care too much, you only need the first. This is a noise gate. A noise gate creates a minimum level of audio to be used. If the audio is below this threshold the audio is muted. This removes any noise the mic might pick up when you are not talking. I’ve used the one that came with OBS. You’ll have to play a little bit with the settings to find the settings that are right for you.

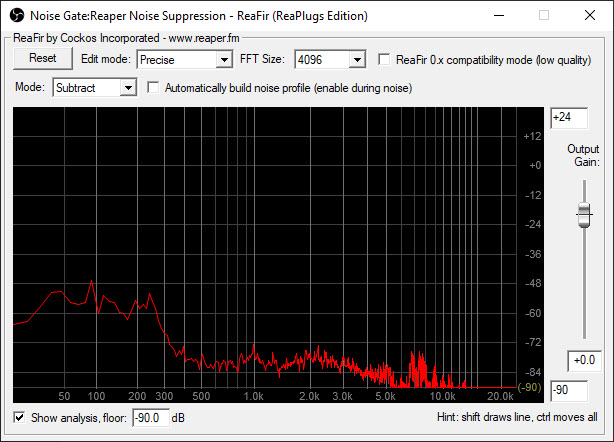
Noise Suppression is the second most important filter I use. This filter removes a lot of the noise at the times you are talking. There’s always a lot of background noise coming from my PC. Noise suppression takes care of that. In this case, I’m using the ReaFir VST. You can train this to create a noise profile and use that to remove it while talking. I’ve also created a second noise suppression profile for when my fan is blowing. I’d rather not use this one since there’s a lot of suppression going, which affects the sound a lot. These are the settings I use normally:
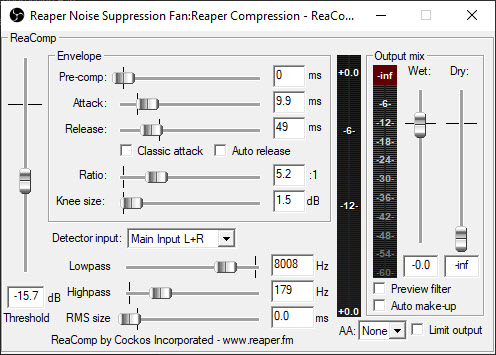
Compression is used to balance the louder and quieter moments while speaking. This makes sure the audio doesn’t get distorted when talking too loud, while also boosting a bit when talking softly.
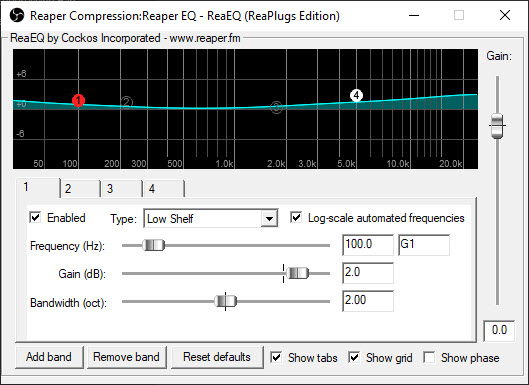
The last filter I use EQ. This filter is used to boost or suppress frequencies. Both the compressor and EQ filters are in constant motion, I tweak these a lot during streams.
There are a lot of tutorials on these VSTs available on YouTube. Like this one from Tuts+ Music & Audio .
Video
The first purchases I made for the stream, I think even before my first stream, was a webcam. From the start, I’ve been using a Logitech C920 Webcam. The quality of this camera is pretty good, for its price. It is very easy to set up. Just plug in the USB and you are good to go.
In OBS I have 1 webcam source I use everywhere. It is a bit laggy when started and I don’t want it to restart when switching scenes.
For settings. On the webcam settings, I disabled all of the auto adjustments. I don’t want anything to change outside of my control. I’m not moving around so the focus doesn’t have to change. And I have people control my lighting through chat, therefore I want to keep white balance and exposure always the same. The only problem I’m having with these settings is that they are reset now and then.
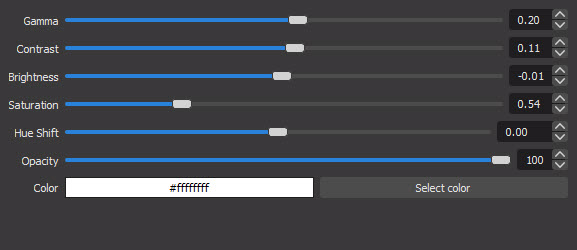
In OBS I’ve added a couple of filter on the camera as well.
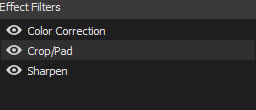
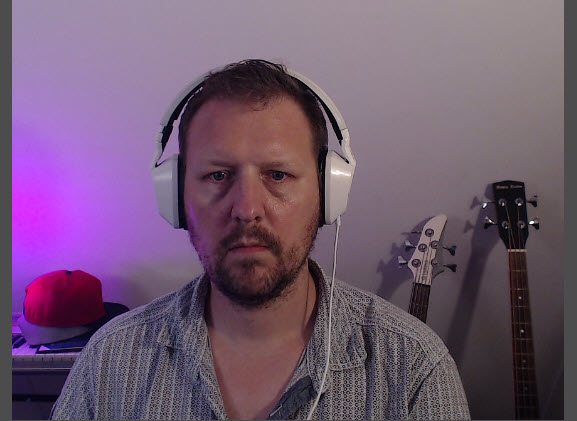
The only one that is making a real difference is color correction. You’ll have to play with these settings yourself to see what you like.
I think that without color correction the video seems a bit too gray.
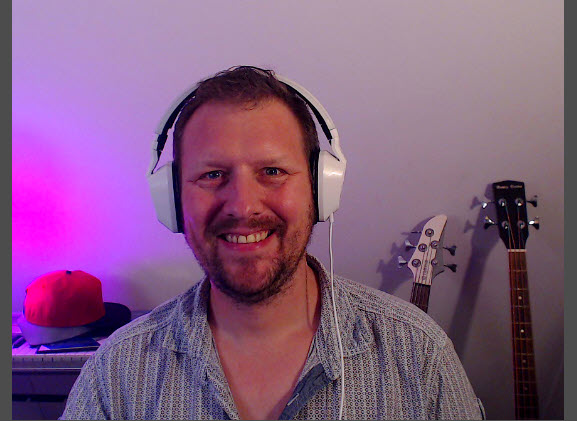
The other two filters I use is a crop for changing the width of the video a bit to make it better fit my layouts. I also add a little tiny bit of sharpness (0.05).
Lights
At the moment I’m using 3 lights during my stream. 2 of them can be controlled by the viewers by giving a !light command in the chat.
I use these lights:
I’ve got the white IKEA light pretty close to the left of me. The Neewer is a bit further away and pointed towards the wall to give a more diffuse light. The colored one is behind me, just outside the camera view and illuminates the back wall.
I bought the IKEA light just to try them and see how they look. I’ve got a couple of Phillips Hue lights around the house as well. The great thing about the IKEA smart lights is that they connect to the base station of the Hue lights and can be controlled in the same way. If you have a Hue bridge you don’t need to buy anything else but the light bulbs to use those.
OBS
The application I use from the stream itself is Open Broadcast Software or OBS . This program lets you create scenes, configure what you want to capture and cast it to various sources, like Twitch or YouTube.
I’ve never used any other program for streaming. I’m using it to stream to Twitch, but I’ve also used it to stream to YouTube or record videos. You can have different setups stored and it is easy to switch between them.
Scenes
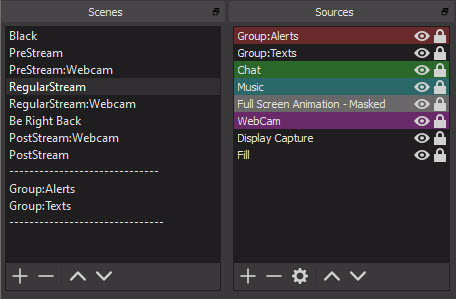
OBS makes use of scenes. Scenes are what you see when watching the stream. They build out of various sources like the webcam, desktop capture, animations, texts, and browser windows.
I recently cleaned up the scenes and the sources. It was a mess with all kinds of old, unused and hidden sources. I created 2 scenes that are reused in various other scenes, alerts, and texts. I also added color so I can quickly see what sources are where in the seen. To be sure I don’t accidentally move a source, I locked everything.
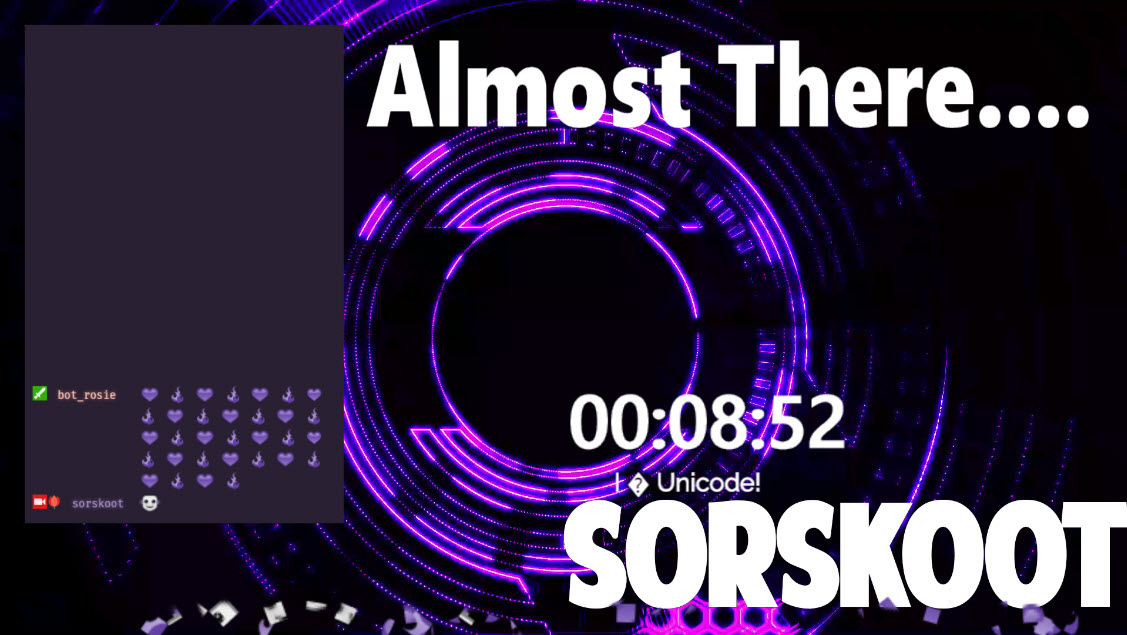
Pre stream
A few minutes before I go live I already start the stream. I send a tweet out at the same time. At this moment my followers are informed that I went live. Having a count down or waiting room gives everyone a few minutes to come in before I start.
I don’t always use the timer. If it’s very short or a weird number of minutes before I go live I hide the timer. I added a ticker that shows random texts, just for fun. This is actually a browser window that’s coming from my layouts application.
The chat is an overlay coming from StreamLabs. I styled it to look similar to the theme I’m using in VSCode.
Pre stream - Webcam
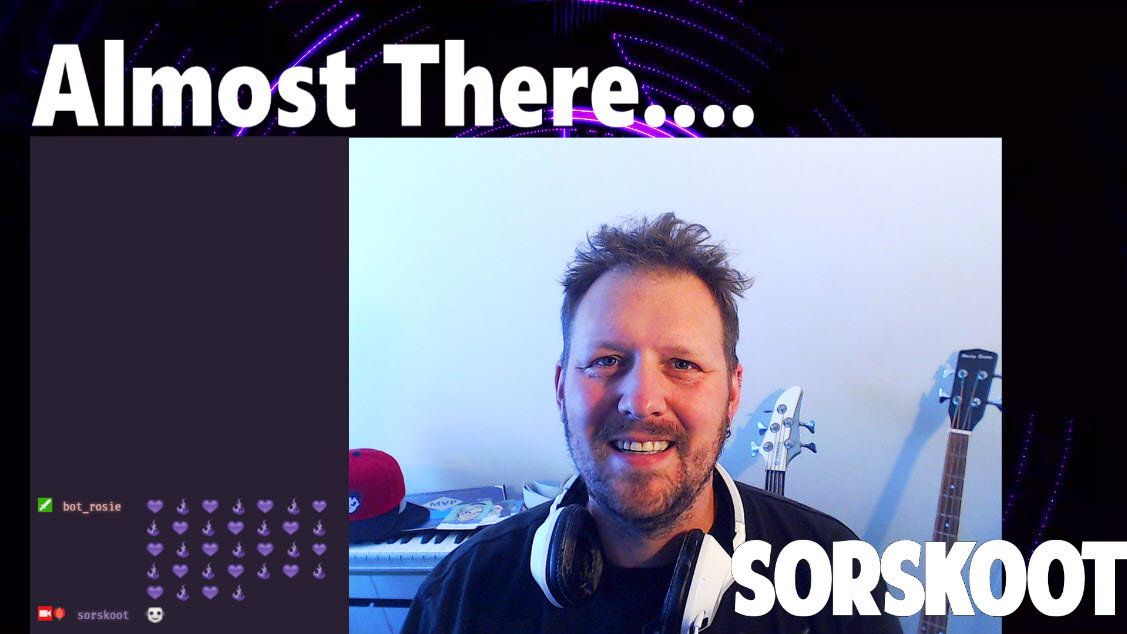
When I start the stream I welcome everyone to the stream using this scene. It has chat and big webcam view. I kept the ‘almost there’ text in there so when people pass by the stream the know I’m about to start.
Regular Stream
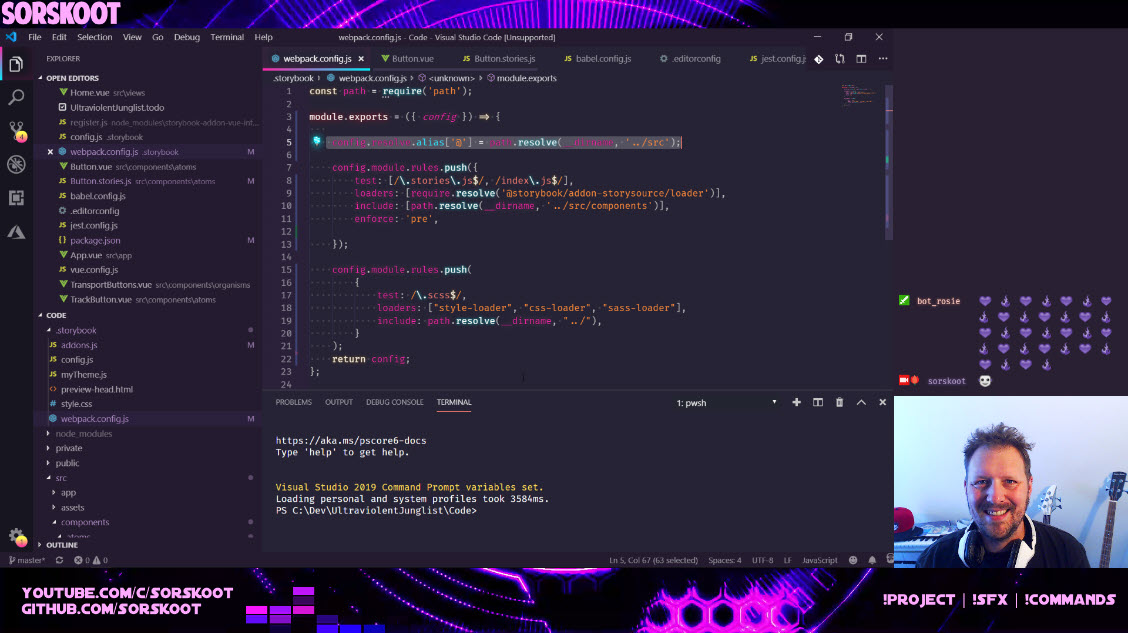
This scene is what is used most during the stream. It has chat, webcam and a view of the desktop. The background animation in this scene has a mask and is actually on top of the webcam and the desktop view. I want to cut off my Windows taskbar and the easiest way of doing that is just hiding it. I tried using a transparent animation but that was way too CPU intensive, so I used the same MP4 but added a mask filter to it with a black and white image.
This scene has everything else going as well, the exploding emotes, alerts and the music player.
Regular Stream - Webcam
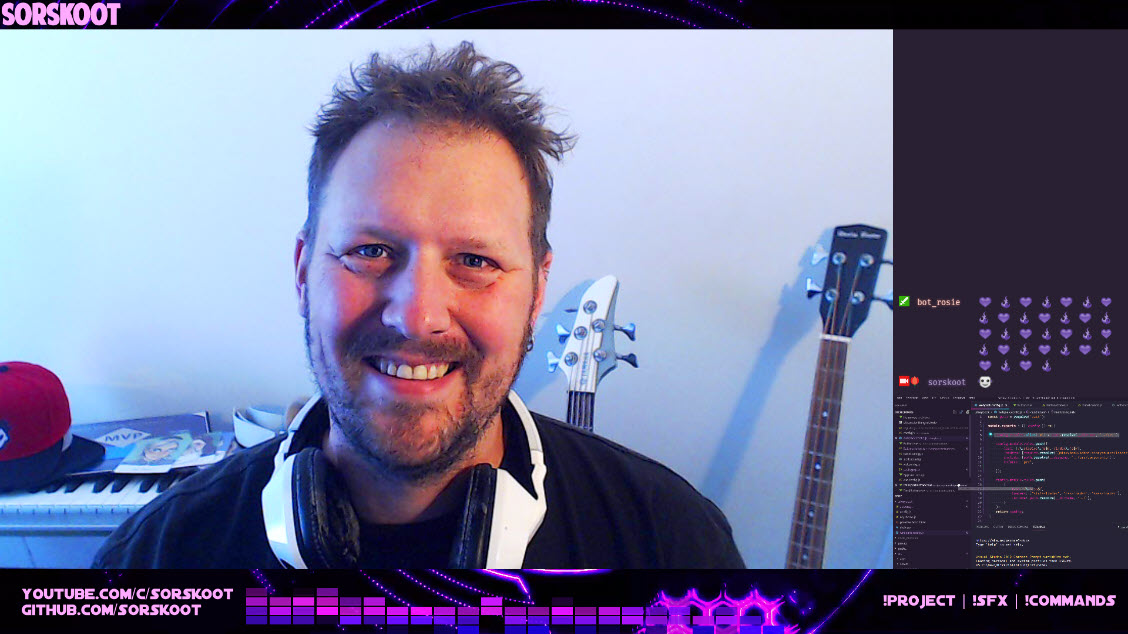
This scene is the same as the previous one but has the webcam and desktop views switched.
Be Right Back
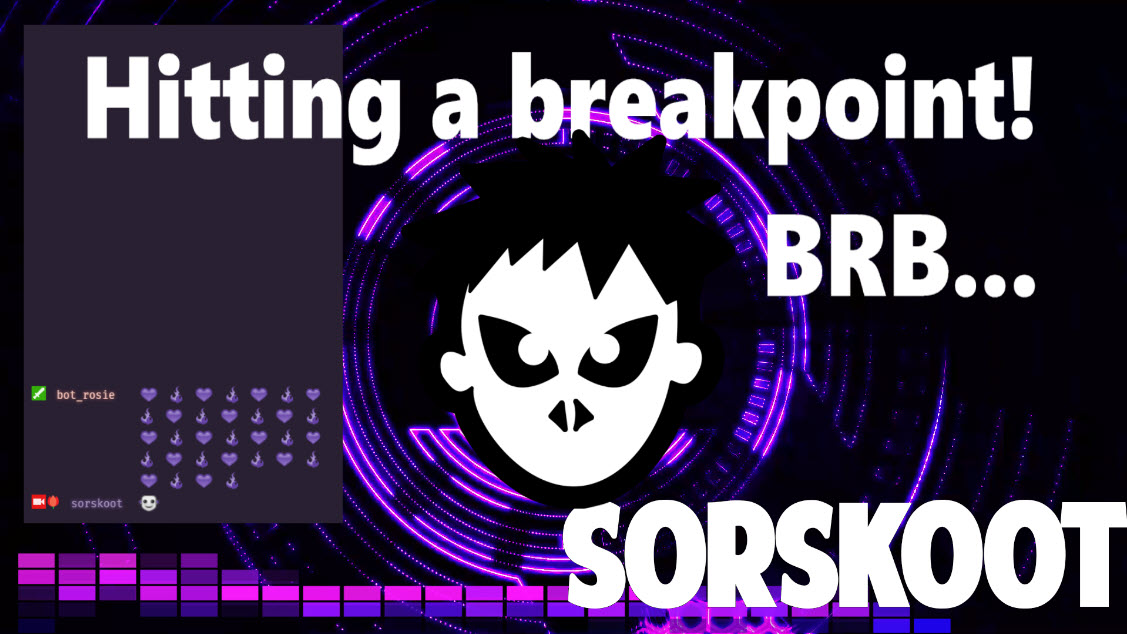
Sometimes I’m interrupted and need to leave the computer for a few minutes. It rarely happens, but when it does I use the Be Right Back scene. I’ve got the chat and the alerts in there.
Post Stream - Webcam
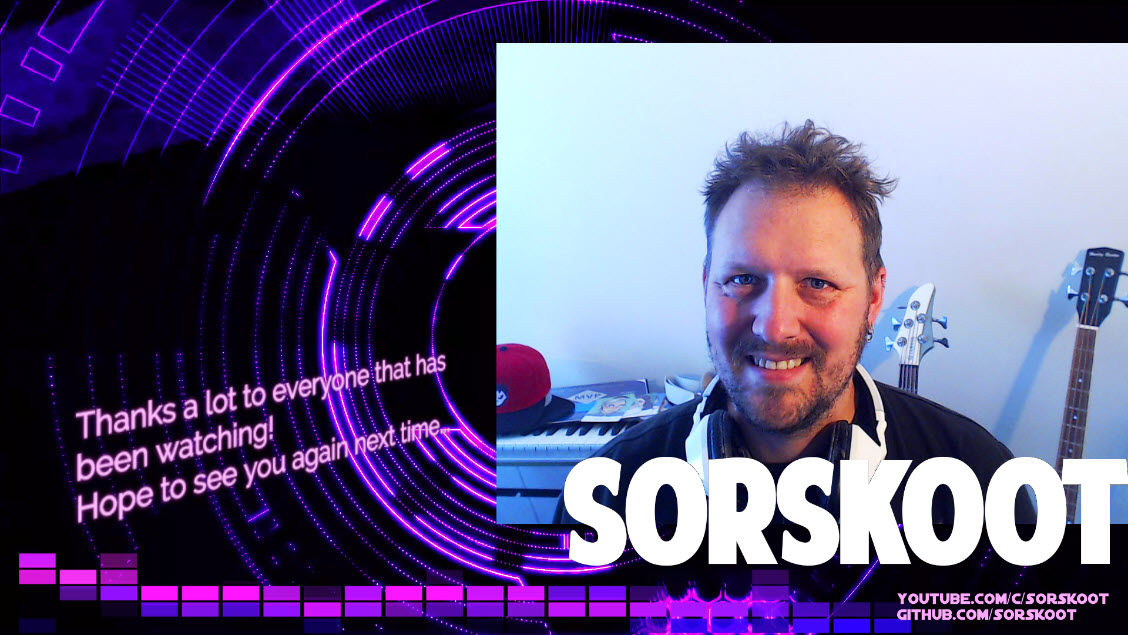
When the stream ends I switch to this scene. It has a big webcam view and the end credits to the side. The end credits are coming from my own layouts. It doesn’t have a chat, but still has alerts.
Post Stream
The last scene is similar to the previous but without the webcam. Sometimes I want to have the stream running a little bit longer, for example when I raid someone. When the raid happens I switch to this scene. The raid is not recorded by Twitch, but the normal stream is. This way you won’t see my moving around but still have a few seconds extra when watching the VOD.
Control
StreamDeck
One of the most used pieces of hardware among streamers is the Elgato Stream Deck . This is a device with programmable buttons. Each button is a small display that can show information. The device is very powerful. I can’t live without it anymore.
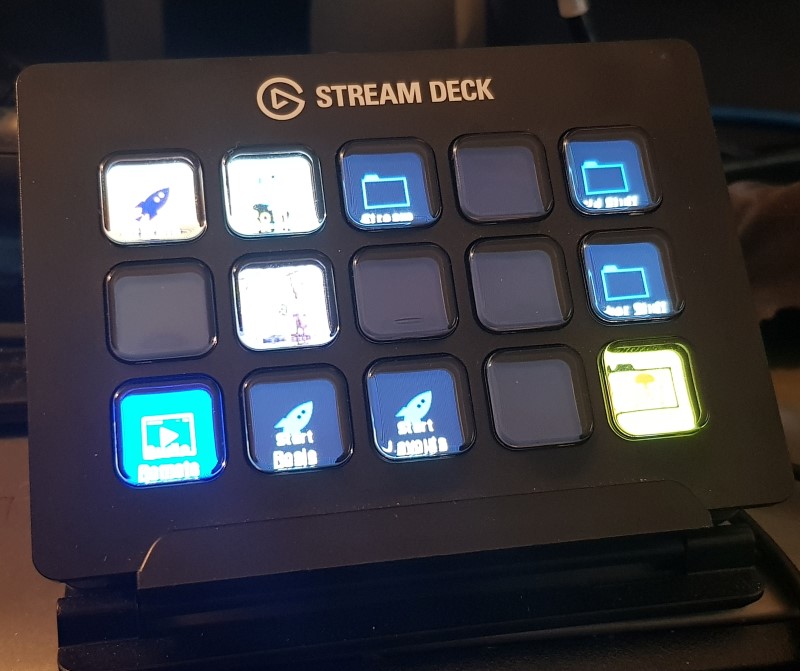
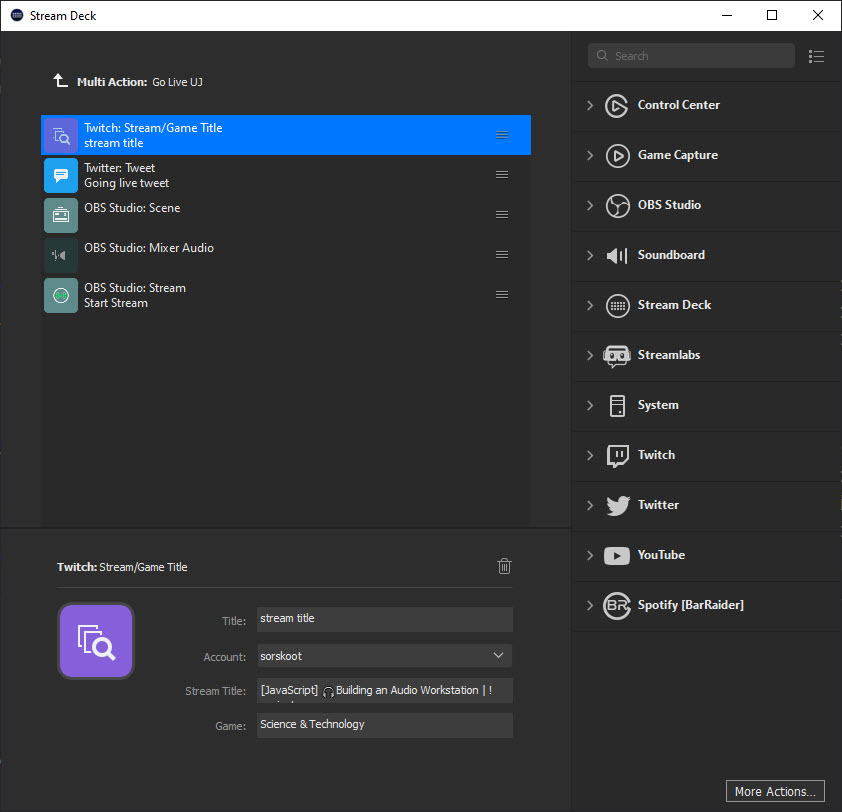
The Stream Deck has a couple of great features I use very often. The first one is the ability to trigger multiple things with 1 button, a Multi-Action. I use this for example to start all applications I need for streaming, or to change a scene in OBS and mute the Mic at the same time. I also have a couple of Multi Actions that I use when I go live. These send out tweets, set the title of the stream on Twitch, select the right scene in OBS and trigger OBS to start the stream.
Bot & Tools
To have a little automated help (and fun) I created my own personal stream maid, Rosie the Chatbot in Node.js. She is inspired by the maid in the old cartoon The Jetsons. During the steam and in between I add commands and features to this bot.
To give an example, I created the !light commands. These commands use the Phillips Hue API on my local network to change the color of the light behind me. This light is also triggered when events happen during the stream.
Also, the sound effects are a lot of fun. These use Midi notes to trigger the effects in SoundByte. I also use Midi to lower the volume of the music playing during events.
I integrated Rosie with the Microsoft QnA platform . When a question is asked in chat, Rosie does a call to this service to see if there’s an answer to frequently asked questions. For example what theme I’m using in VSCode or when my next stream is.
During the stream, I also run another Node.js application that is responsible for the overlays in OBS. The exploding emotes and even the music is run from here. For the music I create a player without controls that just plays a random song from a folder. I have another page that is connected through WebSockets to control the music. I use the web audio API to create the visuals of the audio.
Closing
I think that’s about it. If I forgot something I’ll add it. Feel free to ask any questions about the setup, Rosie or layouts during my streams. I’m happy to help. So come and visit me at twitch.tv/sorskoot or join the discord .


